This week's news from About Chromebooks, November 5, 2023
Hey, Chromies!
Hope you’ve had a good week and that the transition (in the U.S.) back to standard time is painless. I know I appreciated my extra hour of sleep, given the last 10+ days of dealing with COVID. Thanks for the kind words of concern I received; my wife is feeling 100% now and I’m around 85%. Just a nagging cough for the most part.
In terms of what’s new on the ChromeOS and Chromebook front, the Chromebook Plus sale is still running at Best Buy. I didn’t expect that and I won’t republish it here. If you’re interested in the $100 to $200 off deals, I have all of the information for you.
I did find a new accessibility feature this week coming to ChromeOS that looks, or sounds, useful. It pairs Reading Mode and Read Aloud. Google is also readying an upgrade to the Linux container on Chromebooks. I also explain how to see the memory used by each Chrome tab, simply by hovering over it. Nifty!
Finally, I’ve updated my list of “hidden” ChromeOS features I use on my Chromebook. I show you how each works and how to turn them on if you want to use them too.
If you get value from this newsletter and want to say thanks, consider buying me a coffee below or at this link. As always, that’s never required but sincerely appreciated.
Cheers,
kct
This week’s most-read post on About Chromebooks
ChromeOS Reading Mode is getting the Read Aloud treatment
After fighting off my first bout with COVID-19 for a week, I finally feel well enough to dig around some ChromeOS code. My effort was quickly rewarded this morning as I spotted a new experimental flag in the works. With it, the ChromeOS Reading Mode is getting the Read Aloud treatment.
To be clear, you can enable ChromeVox, or text-to-speech, today on a Chromebook. This accessibility feature reads entire web pages or selected text aloud to you.
While that’s helpful, you’ll often hear things other than the actual content of a web page. Some of those things, such as image descriptions, you might want to hear. Other, more superfluous items such as ads are things you might not want to hear.
From a visual standpoint, that’s where the still experimental ChromeOS Reading Mode feature helps. I just covered it in my list of best hidden ChromeOS features I use daily roundup.
With Reading Mode enabled, I can view the distilled web content of any page without all of the frilly bits. However, even with the built-in ChromeVox feature turned on, my Chromebook doesn’t read that content aloud.
That’s where the new “Reading Mode Read Aloud” flag comes in:
The flag isn’t yet available, at least not in the ChromeOS 120 Dev Channel, where I checked. I’m not yet able to test it as a result simply because I prefer not to run the buggier Canary Channel.
However, I think it’s safe to presume that once the flag becomes available, it will be a nice addition to the ChromeOS experience. By reading just the pure content of a web page aloud, users will hear only the content. So there’s no wasted time listening to non-content items on a particular web page.
I’ll keep an eye, and an ear, out for when the new ChromeOS Read Aloud flag arrives, which is expected to be found at chrome://flags#read-anything-read-aloud in the coming weeks.
If you’re curious about the status and progress of this upcoming feature, you can review the bug report here, which was first filed in August as a feature request.
How to hover and view Chrome browser tab memory usage
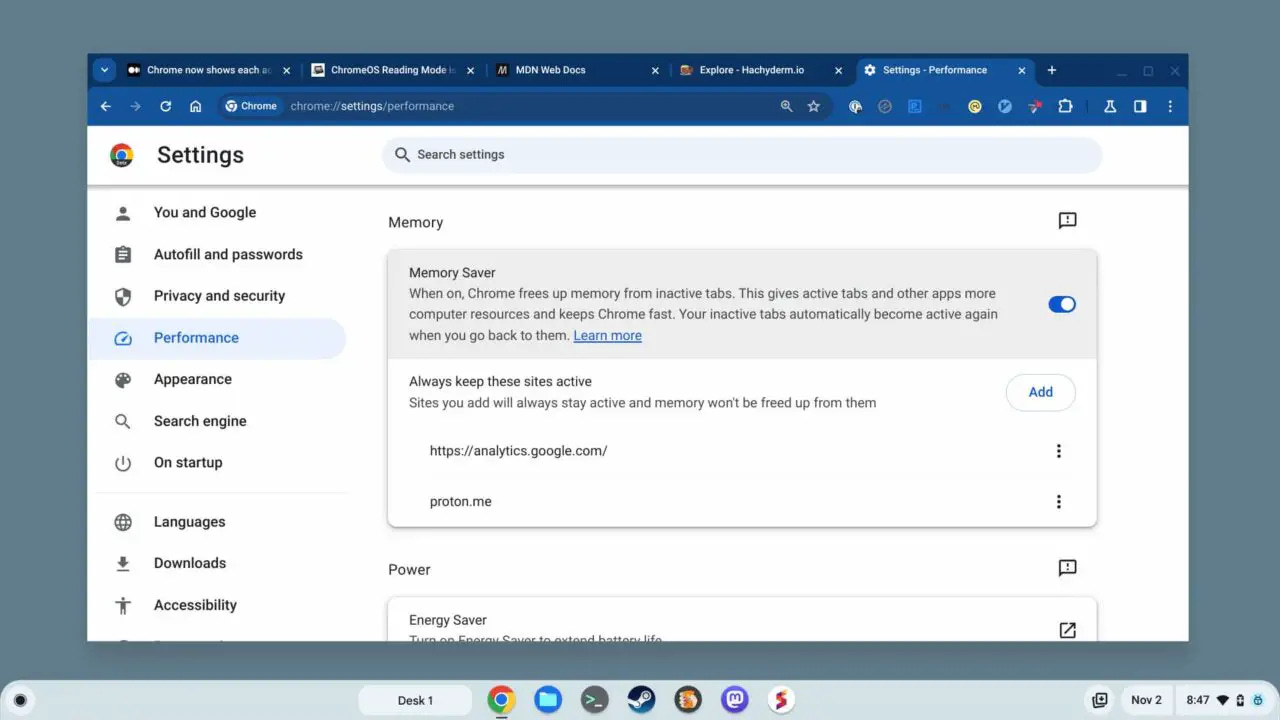
Late last year, Google introduced its Memory Saver feature for Chrome and ChromeOS. Now there’s a supplemental function that shows Chrome browser tab memory usage when hovering over a tab. Here’s how to enable the feature early as it’s not yet generally available for all Chromebooks or versions of the Chrome browser.
First, you’ll need to have the Chrome Memory Saver feature enabled. The process is the same whether you use Chrome on Linux, macOS, or Windows, or if you use a Chromebook.
Open your Chrome browser and click on the three-dot menu near the top right of the browser window. In the menu that appears, select Settings. Lastly, click the Performance option in Settings and flip the switch for Memory Saver.
With Memory Saver enabled you can move on to the next step.
Navigate to chrome://flags#memory-saver-memory-usage-in-hovercards to see the experimental feature settings. Note that if you’re using Lacros as your primary browser like I am, you may have to look for this flag in the os://flags area:
Change the drop-down selection to Enabled and click the Restart button. Your Chrome browser will close down and quickly return to an open state. Now, hovering over any Chrome browser tab should show the amount of memory that tab is using. If you have previews enabled for your browser tabs, hovering will show both the preview and the memory usage.
While this seems like a minor change to view browser tab memory usage, it’s far better than the old method. Particularly on a Chromebook.
For years, you’d have to jump into the ChromeOS Task Manager, which is filled with data on every running process. So your browser tab usage would be jumbled in with any Android or Linux apps, for example, as well as system resources.
Don’t overlook this feature, particularly if you have a Chromebook or computer with a meager amount of memory.
I’ve left some tabs running in the background and have watched them gobble up 2 GB or more of memory over time. Between the automated Memory Saver function and the ability to quickly view memory usage per tab, it’s easier to keep Chrome browser performance at the top of its game.
Debian 12 Linux upgrade for Chromebooks nearly here
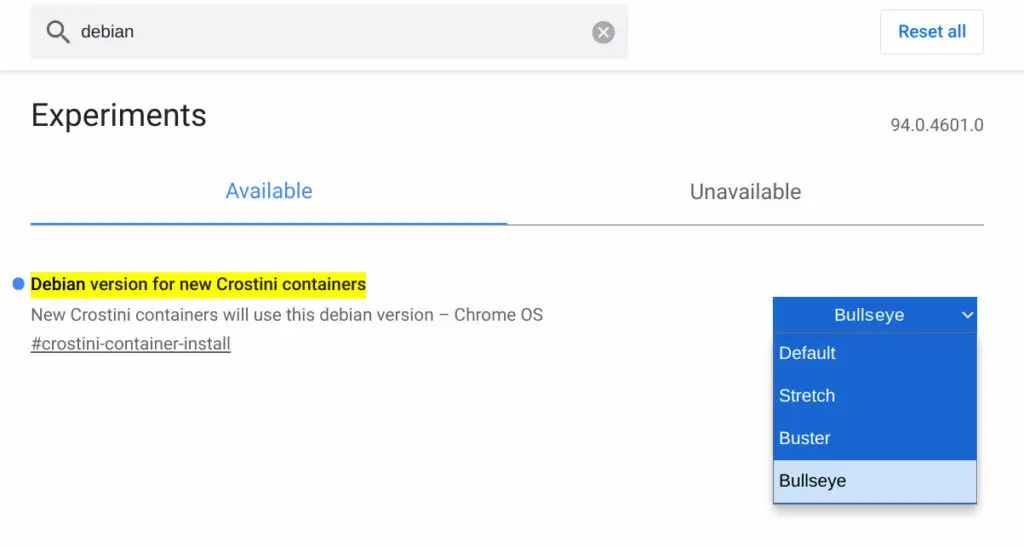
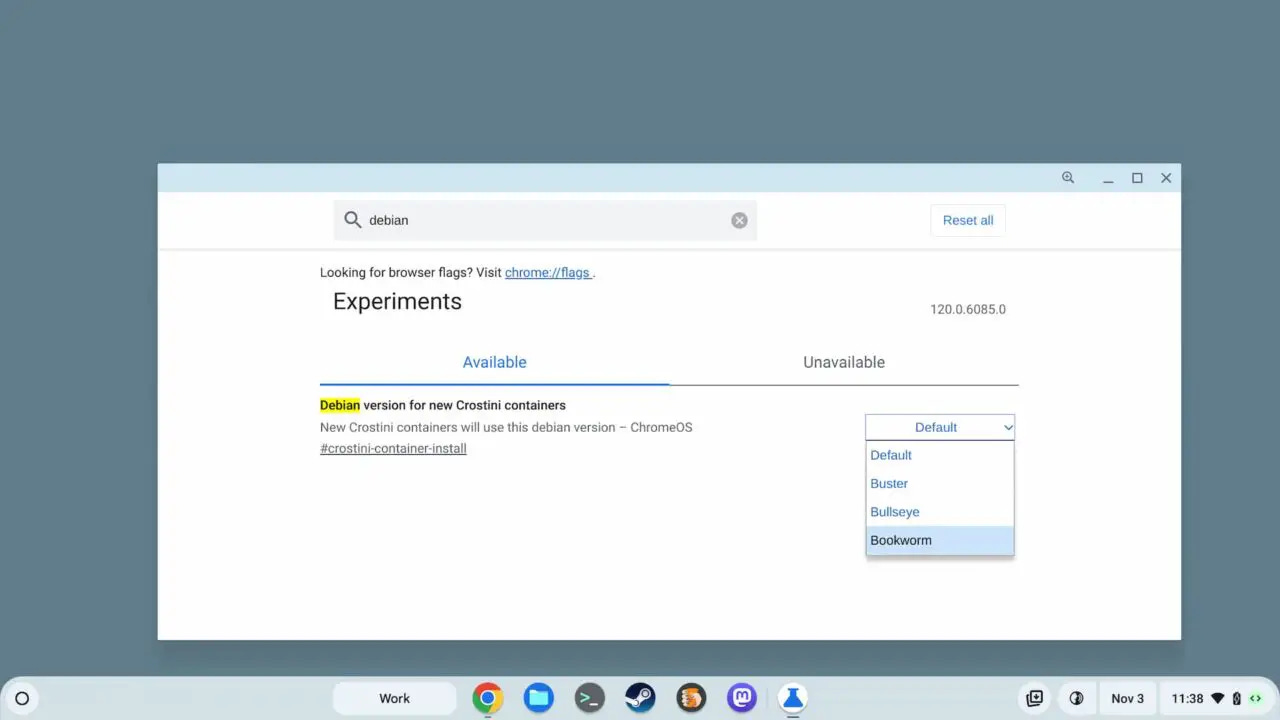
Debian 11 has been the version of Linux on Chromebooks for roughly two years. With the release of Debian 12 earlier this year, Google is readying a Linux upgrade to the newer platform. Get ready for the switch from Bullseye to Bookworm on your Chromebook.
Although I recently made the case that ChromeOS is really a customized version of Linux with Google’s interface, the change I’m talking about doesn’t affect ChromeOS itself. You won’t see any changes or new functionality in Google’s base software platform for Chromebooks.
To be clear, this is the optional Linux feature that most Chromebook users don’t use.
That’s a shame because I think folks are missing out. Regardless, if you don’t use the Linux container, these aren’t the upgrades you’re looking for. Move along… move along.
Users of the Linux container though? You’re in the right place.
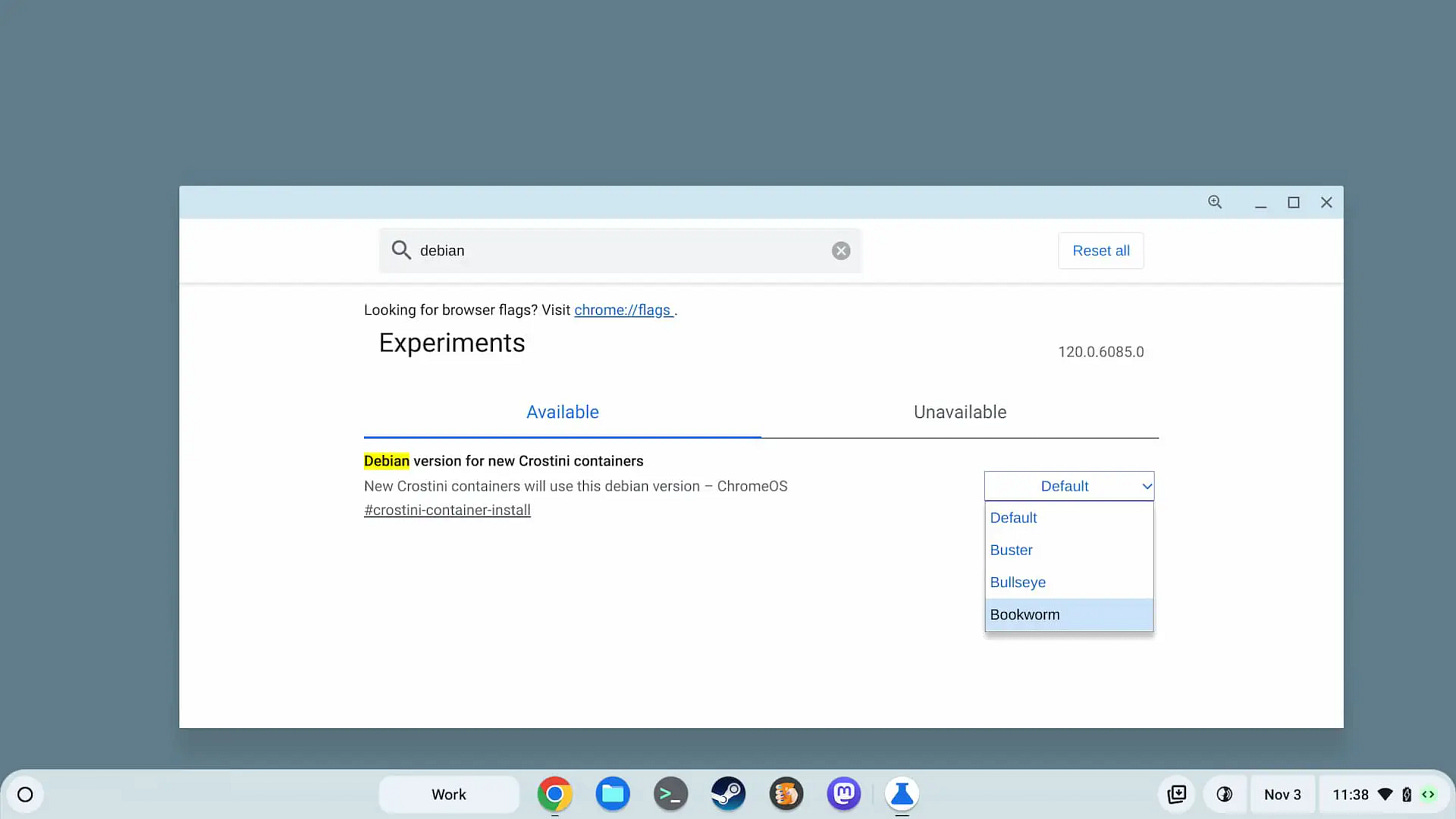
And last week, Google developers added code that will change newly created containers to Bookworm, or Debian 12. Currently, by default, new containers are built on Bullseye, which is Debian 11, software. That’s been the case since ChromeOS 94.
I can already see the new option to use Bookworm for new containers in ChromeOS 120 when running the Dev Channel. So this change should filter through to the Stable Channel in the next few months.
Remember this only applies to new containers, not existing ones. There have been two updates to the Debian 12 upgrade already, so I’m personally comfortable moving to Bookworm for new containers.
Because a whopping 67% of of the Debian 11 software packages are updated in Debian 12, I’m not going to cover them here. It also doesn’t make sense because anyone using Linux on a Chromebook is using very specific software. Running through everything just doesn’t make sense.
But I won’t leave my Linux peeps in the lurch. The Debian site provides a solid overview of the changed packages right here. I’m happy to see VIM 9.0 since I’ve been working hard to rid my life of both the mouse and trackpad. Seriously!
The best hidden ChromeOS features I use on my Chromebook (Updated)
With every new ChromeOS release, some of the experimental features I expected to be generally available don’t make the cut. Previously, I shared the best hidden ChromeOS features I use on my Chromebook with the latest Stable Channel. They may change before everyone gets them but they’re super useful and worth considering. As features become available without requiring the flags, I’ll move them down this list. And I’ll add newer ones as I find them.
Current hidden ChromeOS features I use on my Chromebook
The ChromeOS Desks button is handy
I covered this experimental flag back in July and still use it with the Virtual Desks feature of ChromeOS. It was version 116 that I got the Desks button working on my Chromebook using this flag: chrome://flags#enable-desk-button.
The flag puts a dedicated button in the ChromeOS Shelf, making it easy to switch between Virtual Desks.
It’s particularly helpful if you name your Desks because the name is what is shown on the button. Hovering over the Desks button offers a preview of your Desks. Just click a preview to switch to another Virtual Desk or use the keyboard shortcuts. The keyboard combo is “Shift” + “Launcher” + the number of the desk you want to open.
Reading Mode, aka Read Anywhere for ChromeOS
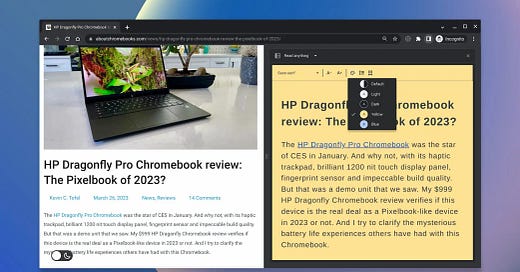
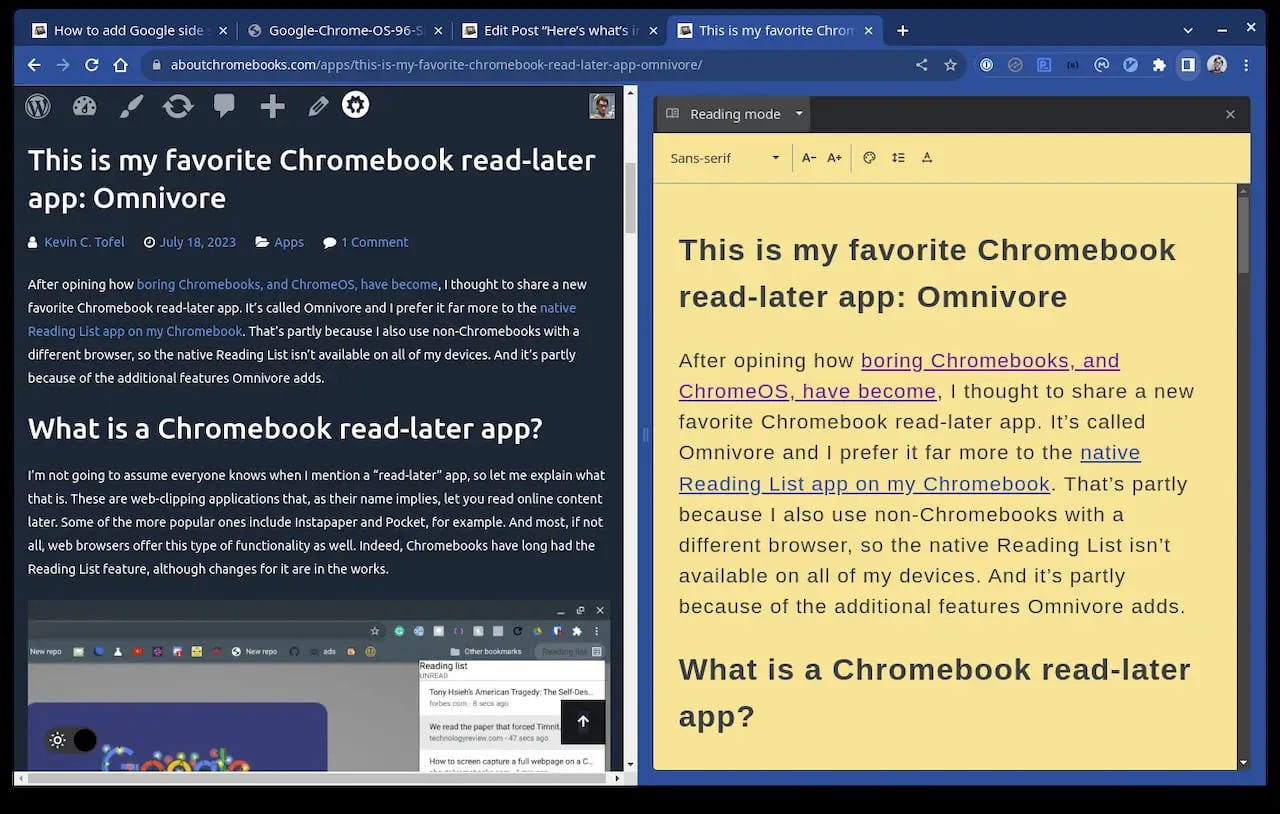
I’ve previously covered this feature as I think it’s one of the most underrated ones available. Reading Mode, previously called Read Anywhere, shows the distilled content in the ChromeOS side panel. It converts a web page from the full to a basic experience in the browser tab. Essentially, you get a side-by-side view of content with the original page on the left and the text on the right.
To enable this mode, point your Chromebook browser tochrome://flags#read-anything, enable it, and restart your browser. Then, you can click the Sidebar icon in your browser, next to the three-dot menu, and select Reading Mode to view just the content of a web page.
Add a .gif option to the Chromebook emoji picker
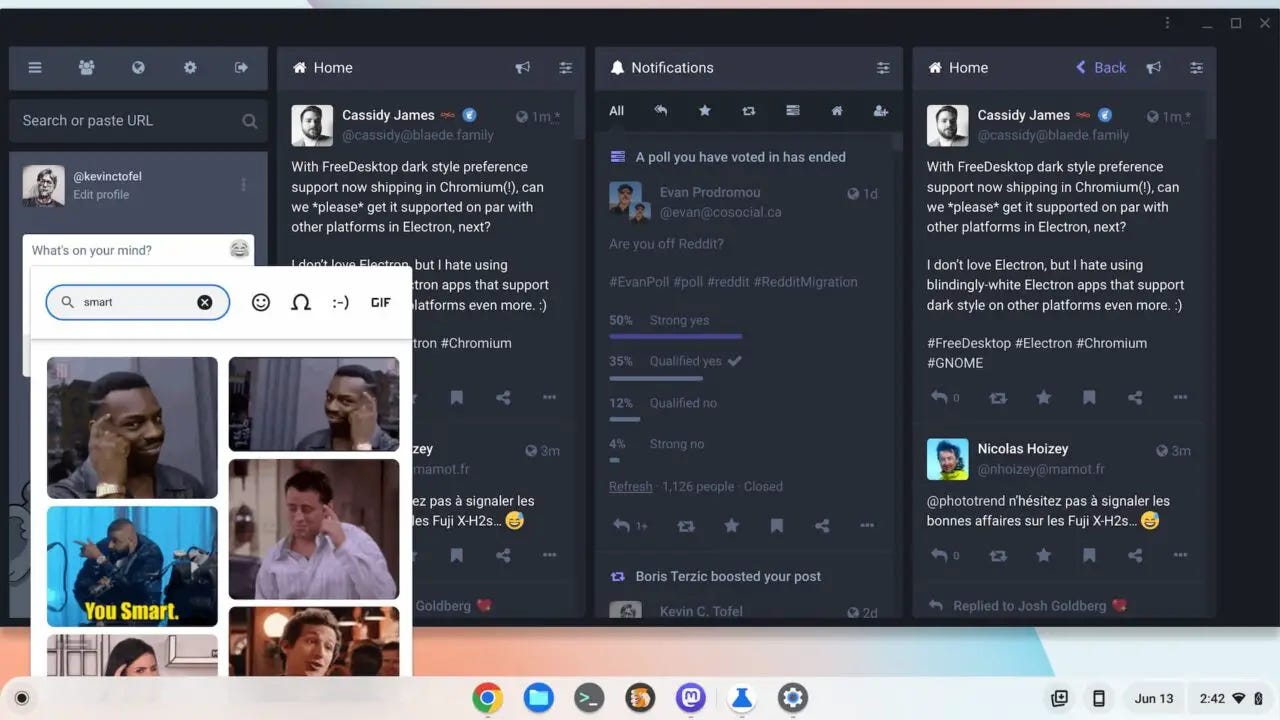
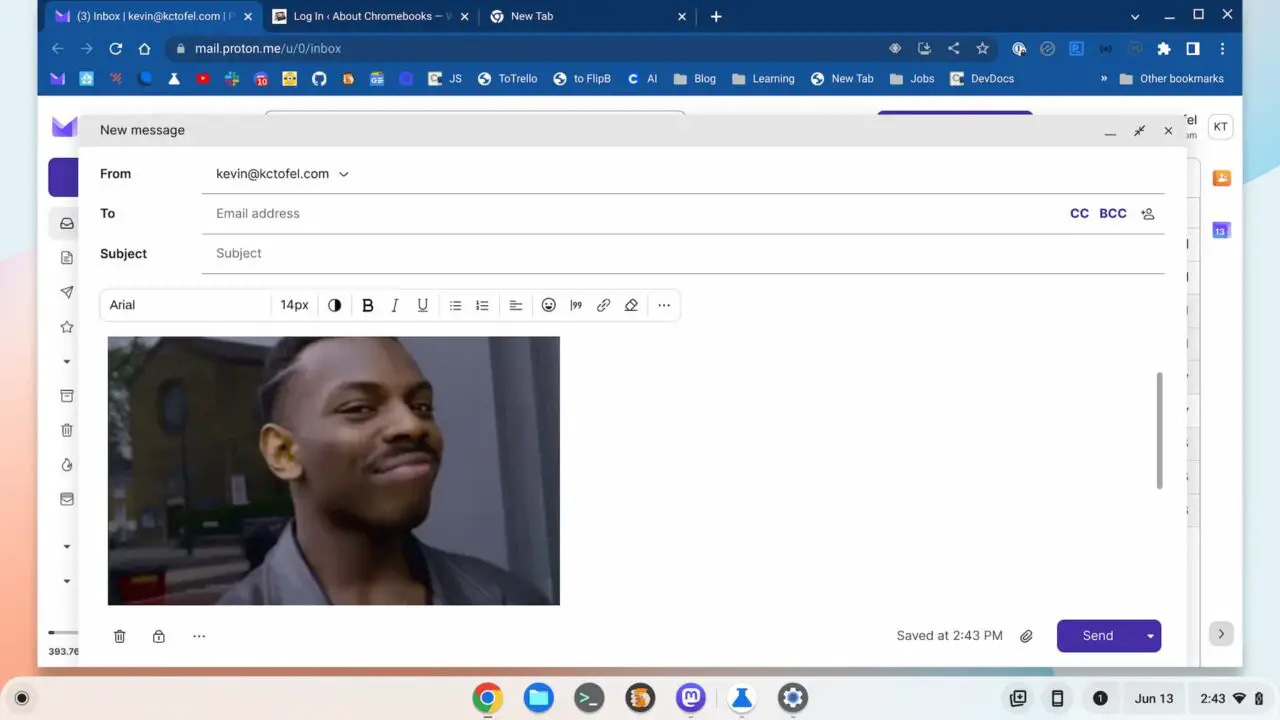
ChromeOS 114 added a native emoji picker menu but I like my .gif files too. And there’s a way to add a .gif option to the new emoji picker that copies an animated image to your clipboard. Here’s what it looks like in the emoji menu and then pasted into an email, for example.
Hop over to chrome://flags#enable-cros-ime-system-emoji-picker-gif-support, set the flag to enabled and you’re set. Any time you right-click on your Chromebook and choose the Emoji option, you’ll see the new GIF selector.
Supersize the Steam client on a Chromebook
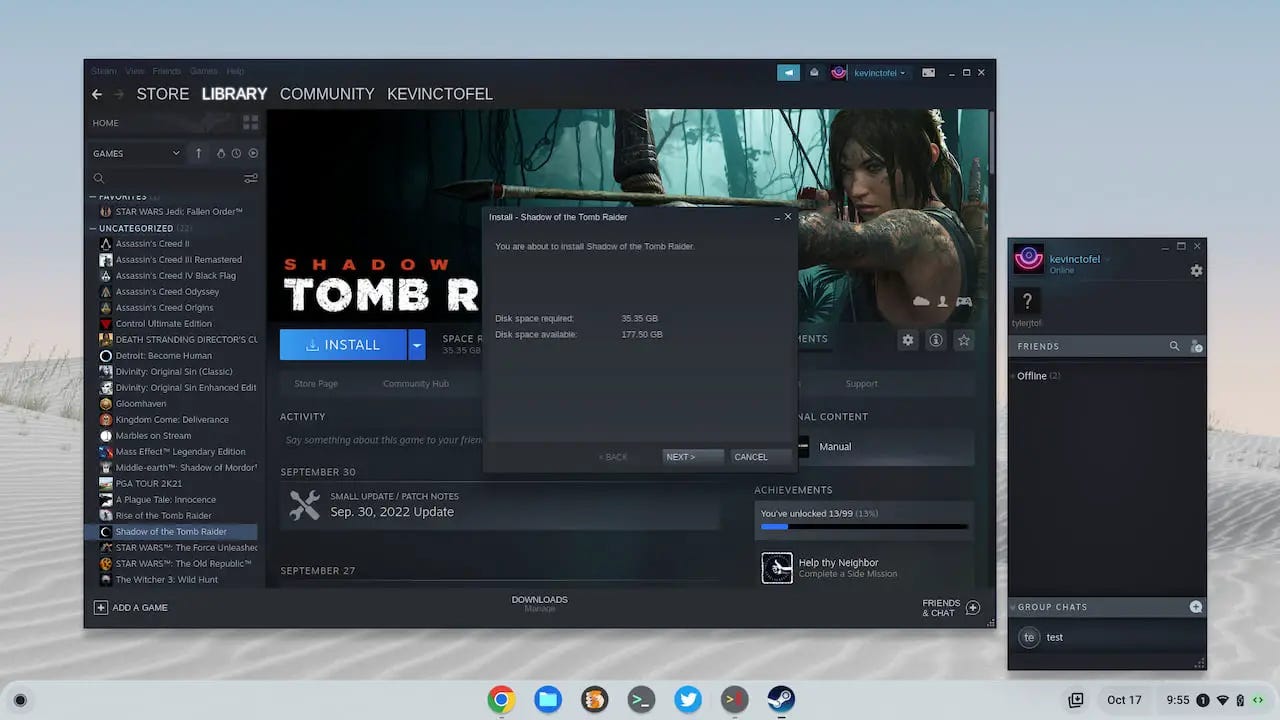
This is one for folks who are really ahead of the curve and are using the Steam beta client on a Chromebook. You’ll obviously need a device that supports Steam, for starters. If you do, you might notice that the Steam client is very small and difficult to navigate or read.
Well, there’s a fix for that: Enable the chrome://flags#borealis-force-double-scale feature to scale up Steam for a more usable experience.
Customize your keyboard shortcuts
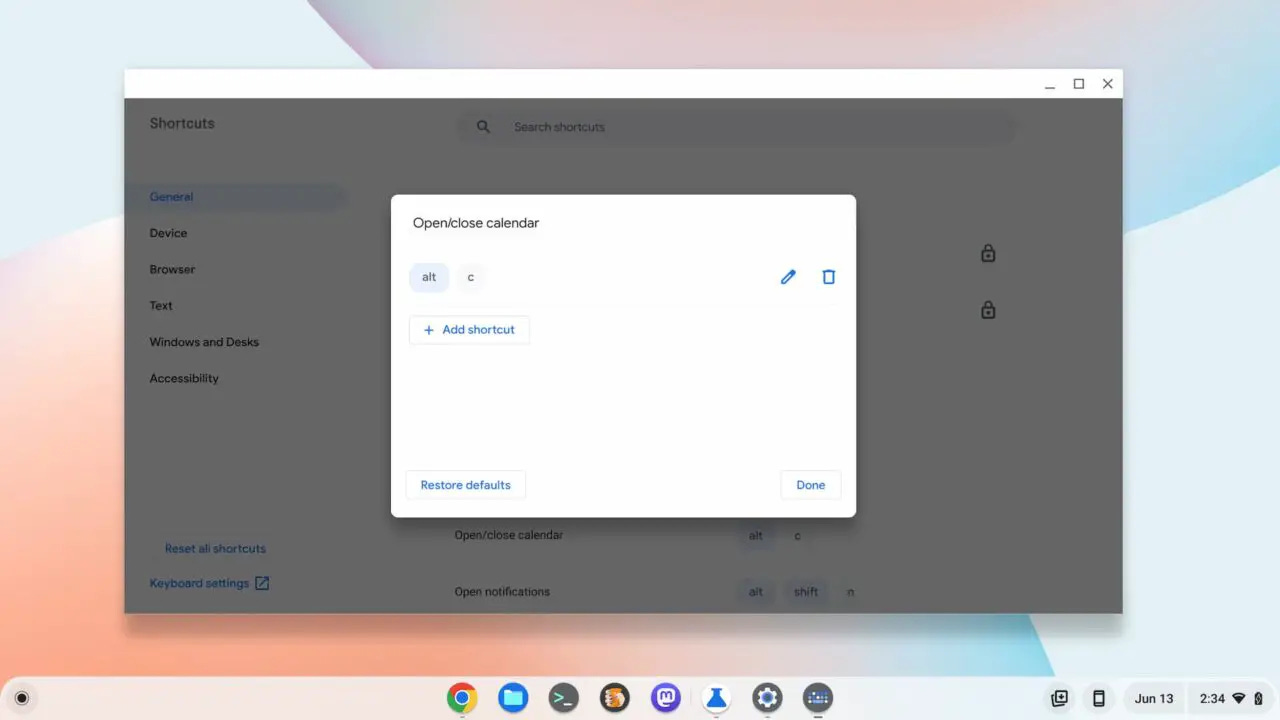
I found this feature a few releases ago but it hasn’t been working. Until now, that is. With it, I can modify and customize Chromebook keyboard shortcuts. For example, the default shortcut to open the ChromeOS system tray calendar is “Launcher + C”. I’ve modified it to “Alt + C” as I have more muscle memory using the Alt key.
Above is the custom keyboard shortcut I created by tapping the pencil icon on the default shortcut. Here are the flags I used to enable this hidden feature:
chrome://flags#improved-keyboard-shortcutschrome://flags#enable-shortcut-customization-appchrome://flags#new-shortcut-mappingchrome://flags#enable-only-show-new-shortcut-app
Older ChromeOS features that don’t require a flag
Note that at the time of the most recent post update, you should find all of these great features available in ChromeOS.
Jelly colors and Material You theming
These two features effectively bring much of the Material You theme to Chromebooks. When enabled, your buttons and accent colors match the colors of your Chromebook theme. Slider options are thicker, so easier to manipulate with a finger. It also makes the buttons larger and more like Android; which isn’t a bad thing.
To enable these and related features, I have these flags enabled, which you can find by typing them in your Chromebook browser:
chrome://flags#qs-revampchrome://flags#calendar-jellychrome://flags#jelly-colorschrome://flags#personalization-jellychrome://flags#customize-chrome-color-extraction
Split window management in ChromeOS
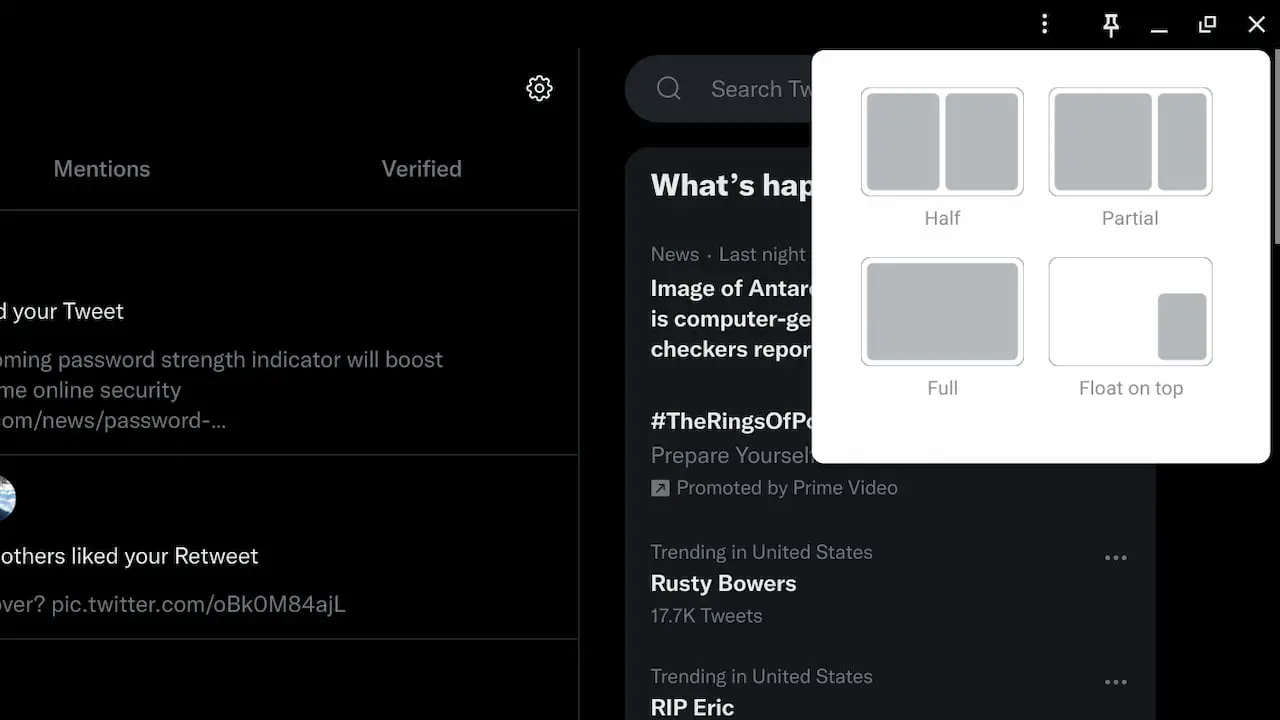
I’ve been using the split window management since it was barely usable nearly a year ago. It’s only gotten better and I find it a great way to split windows across my Chromebook most effectively. When hovering over the Maximize button in an app, you can choose the window split on your display. There are a handful of pre-configured window sizes and locations.
To enable this “partial split” feature, here enable this flag on your Chromebook: chrome://flags#window-layout-menu
Android app streaming via Phone Hub
Sorry, the Android app streaming via Phone Hub didn’t make the ChromeOS 114 cut either. That doesn’t mean you can’t still use it, however. You will need a specific phone, however. A Google Pixel 4A and up will work here as will the Xiaomi 12T, 12T Pro, 13, and 13 Pro handsets. And you need to have Android 13 or better on the supported phone for Android app streaming on Chromebooks as well.
If you have a supported Android phone, these are the flags to enable Android app streaming on a Chromebook:
chrome://#flags/eche-swachrome://flags/eche-launcherchrome://flags/#eche-launcher-app-icon-in-more-apps-button
There are some self-explanatory steps on your Android phone to finish the process, which I’ve outlined here.
That’s all for this week!
Quick update on the reader poll I created two weeks ago. Thanks to all who participated; the results were slightly in favor of a small monthly subscription fee. However, I’m not moving forward with that. At least not right now.
Although this newsletter has nearly 5,000 subscribers, only a small percentage of folks participated in the poll. So I’d rather not make a material change with limited data. Will I revisit this? Possibly. Probably, even, if nothing pans out on the job hunt, which is entering its sixth month now.
Meanwhile, I’ll keep doing what I do, as long it continues to provide value. Have a great week!
Until next time,
Keep on Chromebookin’!

